Step 1: Gather the Ingredients
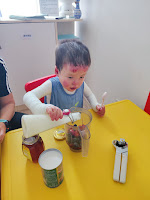
Before embarking on our popsicle-making adventure, we gathered all the necessary ingredients. The first time, we used an assortment of berries likes strawberries, blueberries, and blackberries. We also added honey, coconut milk, and cream. And of course we prepared our popsicle molds, wooden sticks, and a blender. The second time, we switched the fruits and used mango and passionfruit instead.
Step 2: Blend and Mix
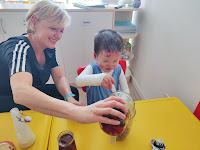
Next, our five-year old little helper, P, was ready to take the lead. He added the fruits to the blender, poured some coconut milk and cream. Of course, he first wanted to taste each of the ingredients. His favorite was the honey! Next, P assisted with pressing the button to blend all the ingredients until smooth.

With the fruit puree ready, it was time to pour the mixture into the popsicle molds. P was very eager to keep "tasting" the puree but eventually agreed to help pour the fruity goodness into each mold.


Step 5: Freeze and Wait
Patience is a virtue when it comes to popsicle-making! Luckily, we had a little extra fruit puree that P enjoyed eating while we placed the filled molds in the freezer.


Step 6: Enjoy the Fruity Delights
P was very excited when we told him the long-awaited moment had arrived! He could finally savor the fruit popsicles he made!
With the sweltering heat outside, making fruit popsicles not only offered a refreshing escape but also provided an opportunity to strengthen our bond with P. The second time around, it was amazing to see how much of the process P remembered. He told us what to do at each step and even tasted the puree to make sure it was sweet enough before pouring it into the molds. We are so grateful that we have an activity to beat the heat, create memories, and relish in the sweet taste of our homemade fruit popsicles.


No comments:
Post a Comment